Showing posts with label tutorial. Show all posts

Wednesday, November 9, 2011

Infant R2-D2 Costume Tutorial

For Halloween this year the big kids both decided to dress up as Star Wars characters, so I needed to find an infant Star Wars costume. At first I thought the baby could be Yoda, but my middle boy decided that is what he wanted to be, so baby became R2D2.  After looking in the stores and online I decided to make it for the little guy (3 months old).  It was pretty easy, however, I waited until the last minute so I had to glue it on instead of sewing it (which was difficult for this sewer).  Hope this helps some of you, because I was not able to find anything like this.


Supplies:
2T long sleeve t-shirt
blue felt or  fleece
scrap of white felt or fleece
scrap of red felt or fleece
grey hat or old t-shirt to make one
glue (if you are going to glue rather than sew)

To make the hat:

I used an old stretchy t-shirt and a hat I had as a pattern.  First lay the hat for the pattern on the bottom seam of the shirt(note: have the shirt right sides together so you can just sew right after you cut).  Cut about one inch around the hat and then sew.


Then I cut out the blue felt pieces and glued them on. I used a picture of R2D2 from google as a "pattern." It was pretty easy, becaseu all of the pieces were rectangels or squares.  I would have rather have sewn them on, but I was under a time crunch.  I did not even have fabric glue, I used tacky glue.  Note: if you glue you might want to make the hat a little larger because it does not strech as much with glue. 


To make the shirt/body of the costume:

My baby was 3 months  and I used a 2T long-sleeve white shirt.  Just like the hat I cut and glued the felt pieces on the shirt, using the internet picture as a guide.  For the black parts I used black puffy paint.  Again it was pretty easy, beacuse most of the pieces were retangles.  The top parts I cut  long strips and then cut into each end on a diagonal to give it the R2D2 shape.


Hope you enjoy!  Sorry for the crazy Halloween Tablecloth.

Friday, August 27, 2010

Bean Bag Tutorial with Activity Cards

100_0291
So the summer was winding down, and the mommy and me class that I teach was almost over.  I wanted to leave them with a gift, but something they could use.  So I thought a set of beanbags and activity cards wrapped in a scarf would be great.  There are many different tutorials and patterns for bean bags, however, this is what I did to make mine.
Supplies:
Fabric Squares (mine were 5 x 5 much bigger would be difficult  for small hands)
Filler: I like using flax seed, it is cheap and feels “neat” and then the bean bag can be used as a boo boo bag.  Something else I like to use is poly pellets, which, can be a little difficult to find, but the beanbags can be washed.  Rice and beans can be used as well.
Thread
Sewing supplies
For some of my beanbags I put the child's picture, using pintable fabric, on one side.
Sewing instructions:
1. Cut fabric into 5  x 5 inch squares.
2.  If putting a picture on the beanbag follow this step if not go to set 3.   Import picture(s) into a word document and resize (mine were around 3 x 3 inches.  Print onto printable fabric and follow the manufacture instruction.  Cut out leaving 1/4-1/2 inch boarder around each picture and press under (so there are no “raw” edges).  Pin onto one 5 x 5 square and topstitch.
3. Pin 2 squares right sides together leaving a small opening to turn.  Sew and turn out.
100_0257
 100_0282
4.  Press all seams.
5. Topstitch starting at the end of the opening and go all around the square stopping before the opening (basically topstitch around the perimeter leaving the opening open)
100_0287
6.  Stuff with filler of choice.
100_0286
7. Pin opening closed and stitch closed.
100_0288
100_0289
8.  Enjoy playing with you new beanbags.
Notes:
One thing I would like to do is make a set of different shapes (square, triangle, rectangle, circle) which helps reinforce shapes.
Great birthday party favors/gifts

Here is one set of Beanbag activity cards, I will post more later.  They can be printed from your computer or have them printed from a photo website (I used Costco and target because I did not want to use up my ink).  Once printed you can punch a hole and attach them with ribbon, 3-ring binder clip, or small chain.  I wrapped mine in a scarf, which can also be used for playtime (activity card for that is included).

image


Photobucket


mmm button  

Monday, August 23, 2010

Crinkle Owl tutorial

100_0283
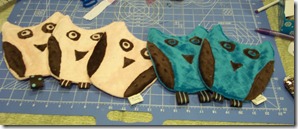
Having 2 children our house is filled with toys, but I have found that some of their favorite things to play with were not toys at all.  For example water bottles, spoons, wrapping from the baby wipes, and paper towel tubes.  So when the baby class that I teach was ending and wanted to give them something that their babies would love to play with.  Originally I was going to make a small “taggie” blanket, but of course I had to make up something a little cuter.  So I came up with the idea to make a owl taggie, but I remember how much my kids loved things that made the crinkle noise.   Here is my tutorial for a owl crinkle “toy.”

Supplies: 
2 10x10 pieces of minkie fabric
Scraps of minkie fabric for wings and eye
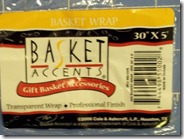
Crinkle material (I bought a roll of cellophane at the craft store, but I have read that some people use baby wipes bag, or cereal bag)
Scraps of ribbons for feet
Thread, pins, and sewing machine
Batting (optional)
Instructions:
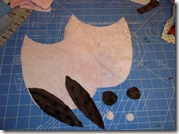
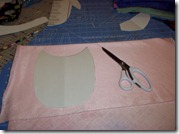
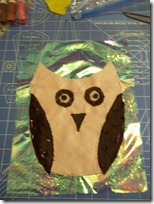
1.  Cut out all  pieces.  You will need an owl, a pair of eyes, nose, and 2 wings.  To make an owl pattern I looked on Google image search, but they were a little more detailed than I wanted so i just freehanded one.  I am not an artist, but it was pretty easy, and if I could figure out how download one let me know.   To make the wings I traced another copy of the owl pattern and then cut out an oval like shape.
100_0155 100_0156
2.  First I sewed the circles together to make the eyes.  This was probably the most tedious part of the sewing because they were so small.  I did a brown, pink and then another brown (you could leave out this piece, but they looked a little “dazed” to me).
100_0161 100_0162 
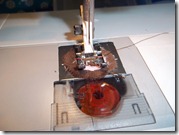
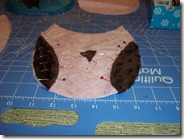
3.Pin and then  sew nose, eyes, and wings onto the front side of the owl.  I liked using a zig zag stitch to sew them on for added durability.
100_0159 100_0169 100_0172 100_0171
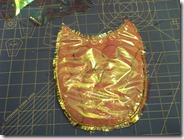
4. Pin 2 pieces of cellophane (or whatever plastic you are using) to the front of the owl and baste.  Also I liked adding one layer of batting between the layers of cellophane.  You may not want to have the batting go all the way to the ears b/c it is difficult to turn, but since you will topstitch it the batting will not shift.
100_0217 100_0220 100_0225 100_0233
5.  I then sewed over the nose and wings again with a straight stitch to make sure everything would stay in place (you cannot really see the stitch.)
100_0219
6.  Pin the back and front of the owl right sides together.  for the feet I pinned  a a scrap of ribbon, making sure the fold is inside (close to the nose).  I forgot the feet on this owl, it still looks cute, but babies love tags/ribbon.  Sew leaving a small opening for turning (I like leaving an opening on straight side so I made my opening between the ears and wings).
100_0221 100_0225 
7. Trim excess and turn inside out.
100_0223 100_0226
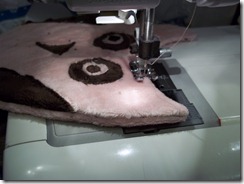
8. Pin opening closed and topstitch around the entire owl remembering t0 backstitch.
100_0229 
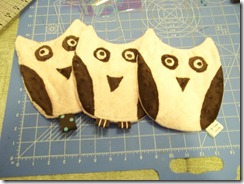
9.  Trim excess threads and give to baby!  Sorry the color is not too good on my pictures, but they look really cute in person.
100_0237 100_0238

Notes:
- add more ribbon around the owl to make a taggie
- add stuffing to make an owl softie
- Put cellophane just behind the eyes and wings if it is too noisy for you.
-washing: cool water with like colors, and low heat in the dryer or line dry ( I have washed mine once and the cellophane stayed in place and was just as crinkly) 
Let me know what you think and if you make one.  Any tips on downloading a pattern, let me know.  Enjoy!

Photobucket

mmm button

Wednesday, July 28, 2010

Batter Up !!


I cannot believe that my oldest son is turning 5 in a week. Where has the time gone? It seems like I was just taking him home from the hospital. For his birthday party he wanted a baseball theme party, in particular the Los Angeles Angels of Anaheim. Since being on a t-ball team this spring all he wants to do is play, watch, and talk about baseball. Right now I have been working on the party favors, which have gone from a simple bag to a drawstring backpack. They are fairly easy to make, but it seems like everyone who is invited is coming, so I am going to have backpacks coming out of my ears. I found this easy tutorial from Noodlehead blog. I changed a few things (no zipper and I increased the size slightly). I will be posting more as I decide what to do for entertainment for the little munchkins. Let me know if you have any swinging ideas.


Photobucket


Wednesday, July 7, 2010

Calling All Superheroes...Mini Tutorial


Being a mom of 2 young boys means that I have learned a lot about superheroes. For example there is not just Batman, Superman, and Spiderman. Oh no, there is also The Flash, Green Lantern, The Atom, Wonder Woman (ok I remember that one), Green Arrow, Robin, and Aquaman. And these are just some of the heroes, I have not even named any villains. Flying around the house pretending to fight crime and the evil villains of the world. So I thought I would help them make the world safer be making some superhero costumes. I began with reversible Batman/Superman cape and then I thought they needed some more equipment. So a wristband (that can make calls to Batman and can shot bat rays) and a tool belt for all the crime fighting "supplies." So I thought I would tell you all how to make one for your superhero. I am calling it a mini tutorial, because I do not have any pictures, but it is pretty straightforward.

Click on the  link below for the tutorial!  this is my first one so PLEASE let me know what you think and if you have any suggestions.  Thanks!

Wristband Tutorial


Photobucket